3D printer DIY? or Buy? or... Part 1
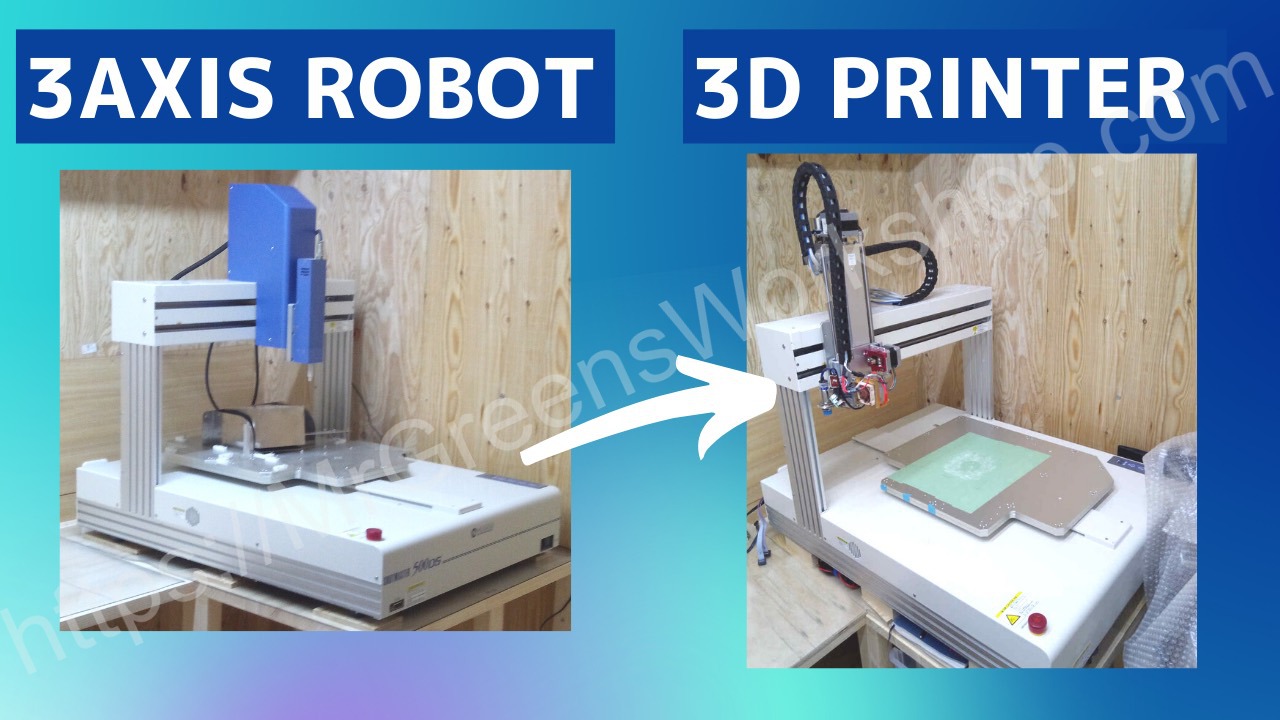
I made my FDM 3D printer from junk industrial robot. Budget, needs, skills and moral could be different for each person. I will talk about my experience so you can get some ideas. I have already released a YouTube video, so please take a look.
Overview
Why do I need 3D printer at firsthand?
Because 3D printed objects can be modified to meet individual needs. It could help repair damaged parts or make spares for home appliance. This could extend the life of existing products. In this way it could be help to reduce the amount of waste. I believe this could contribute to achieve goal 12 responsible consumption and productions, which is one of the UN’s Sustainable Development Goals. Plus, for a maker 3D printers are essential.
FDM 3D printer components
Let me give you a quick brief about cartesian FDM 3D printer components.
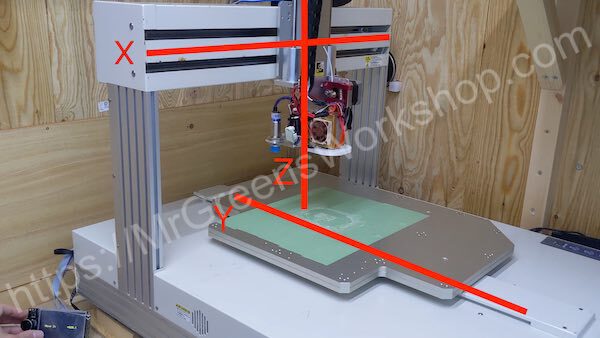
Motion mechanisms, XYZ axises
Extruder
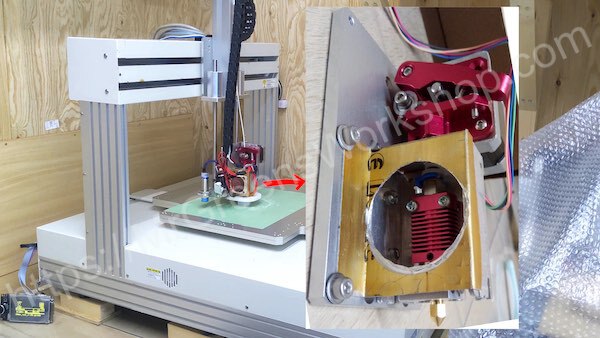
Cold-end
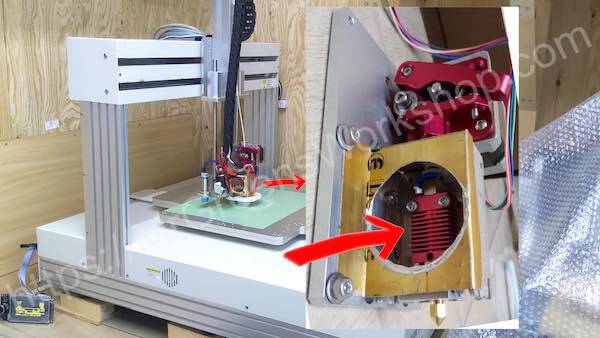
Hot-end
Direct drive feeder
Power supply
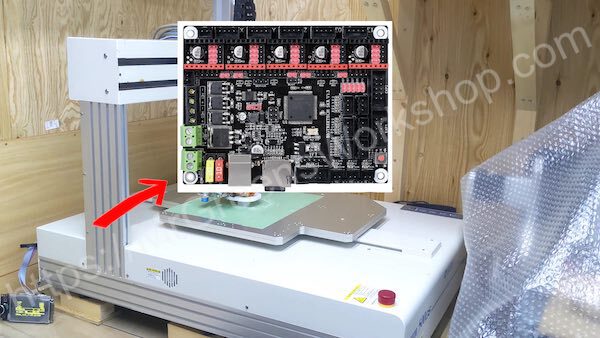
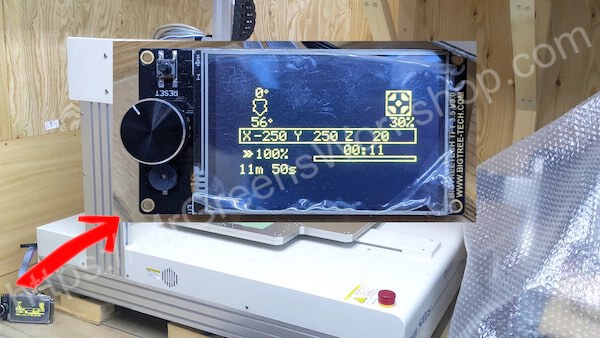
Controller
User interface
How did I decide to make?
How did I decide to make instead of buying a brand new one? Let me tell my story.
Required specs
What are my needs for 3D printer?
- Has to be cheap since I'm new in the 3D printing, I need affordable one for learning and experimenting
- Spare parts must be affordable and easy to get
- Self maintainable
- Easy to maintain
- Quiet
- Safe to use at home environment, like fireproof
When I search cheap printers, I found the budget should be around $220.
Common problems
When I search what problems people have with these printers to make sure there are no mandatory fixes which cost time and money. I found these common problems with most cheap 3D printers and I roughly estimate the cost of upgrades.
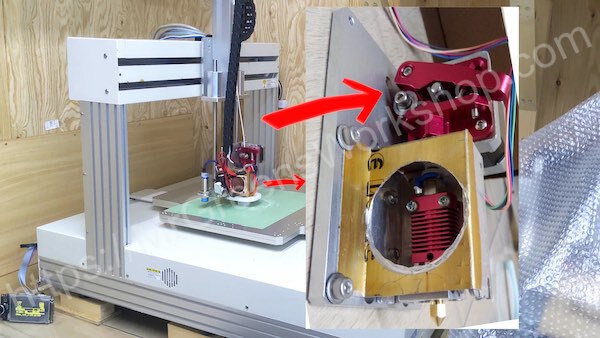
- Plastic extruder feeder problems
- Cause
- This is because, as it is made of plastic, after a few weeks of use the filament will erode a hole and drag the filament out. This causes under extrusion.
- Upgrade / Fix
- Upgrading to metal extruder feeder. $15
- Cause
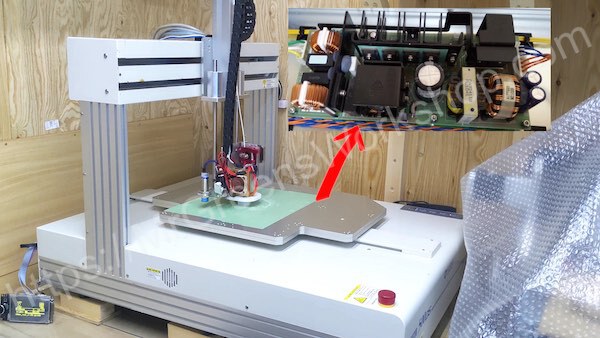
- Power supply problems
- Cause
- Using cheap power supplies causes various problems. When it’s broken, it will mostly damage the control board and screen, and sometimes it could even catch fire.
- Upgrade / Fix
- Replacing reliable branded power supply. $35
- Cause
- Under Extrusion problems
- Cause
- The PTFE tube causes too much friction, which leads to under extrusion.
- Upgrade / Fix
- Upgrading direct drive extruders but it’s not compatible with all printers. $40
- Cause
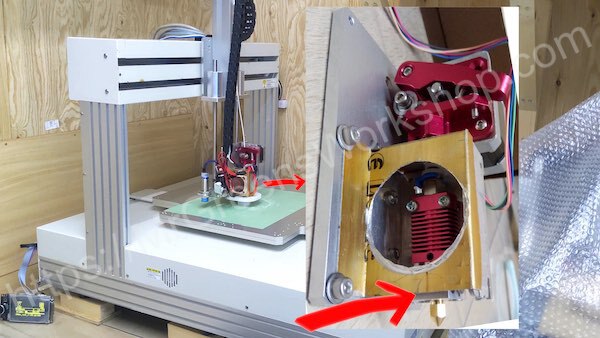
- Extruder clogging
- Cause
- This is mostly caused by the hotend’s cold side not being properly cooled.
- Upgrade / Fix
- Expanding the cold end surface to achieve better cooling. Variable fan speed control for better heat control. $5
- Cause
- Noise
- Cause
- Some of the noise sources are cheap motor drives and part cooler fans running at max speed.
- Upgrade / Fix
- Upgrading motor drivers, dampers, and controller(fans speed control) $50 + drivers
- Cause
- Cabling problems
- Cause
- Most cheap printers don’t come with proper cabling and as a result, it causes cable failure. This could cause even fire!
- Upgrade / Fix
- Doing cable management, replacing some of connectors and power cables. $15
- Cause
To me these upgrades or fixes are mandatory. It will cost more than $160.
Conclusion of DIY or buy
I have two options.
- Option 1,  Buy
  - New cheap 3D printer      : $220
  - Upgrades                  : $160
  - Total cost                : $380
- Option 2,  DIY + Upgrades
  - Upgrades                  : $160
  - Mechanics                 : $150
  - Total cost                : $310
*Prices could be little off
But wait! Considering SDG goal 12, I believe every machine or device manufactured should be used as long as they can be reused in any way but recycled once they have finished their lifespan. While thinking about these, then I realized I had the third option. Maybe even better one.
 - Option 3  DIY + junk 3 axis robot + Upgrades
  - Junk 3 axis robot         : $60
  - Upgrades                  : $160
  - Total cost                : $220

Just a plan
How about if I buy junk 3 axis robot and build a 3D printer on it using upgrade parts as I mentioned?
Pros and cons
Pros and cons of the third option
- Pros:
- In SDGs perspective, this could reduce waste.
- I will learn something.
- If I can find industrial robot, position precision will be glorious.
- Cons:
- It will take more time than buy and DIY option.
- Unexpected problems may occur. Needing some circuits for motor controls etc.
- Junk can be really scrap and not good at all.
Skills and tools
Required skills and tools
- Mechanics
- Basic skills for drilling holes and taping, making parts, cutting, milling etc.
- Electronics
- Enough knowledge of electronic circuits to know how to connect things together safely.
- Computers
- Compile open source firmware (marlin)
- Programming
- Customize the 3D printer firmware (marlin) for your needs.
- Tools
- Various tools for each subject needed and to know how to use them safely.
Calibration cube
The story hasn’t finished yet but, let me show you the 20mm calibration cube printed with this 3D printer.
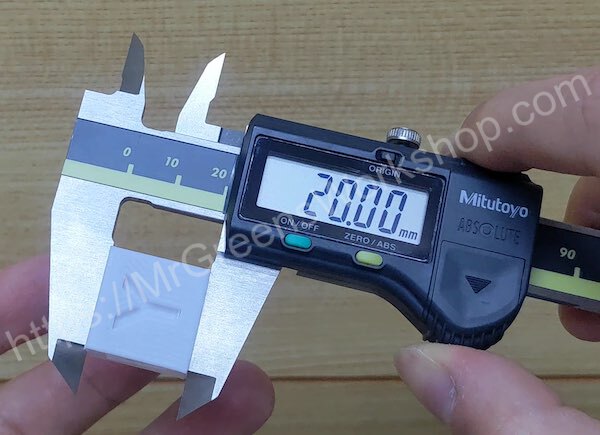
I have small elephant’s foot issue. I haven’t finished all calibrations yet. As you already know I chose option 3 and it turned out good 3D printer.
Close-ups
For other pictures such as making process, please check out my Instagram page. You can find in About page.
You Can Support My Work
Creating projects like this takes a great amount of time. Much appreciated if you consider supporting me so that I can continue projects like this and creating new contents for everyone.
You might consider supporting me via GitHub Sponsors, Patreon, or Ko-fi. For links, please see the About page.
Next post
What problems did I deal with? How much did it cost? I talked about those in Part 2.